Download
Order
Versandkosten
Zahlungsarten
Lieferzeit
Kundeninfo
Datenschutz
Impressum

Creating Text engravings

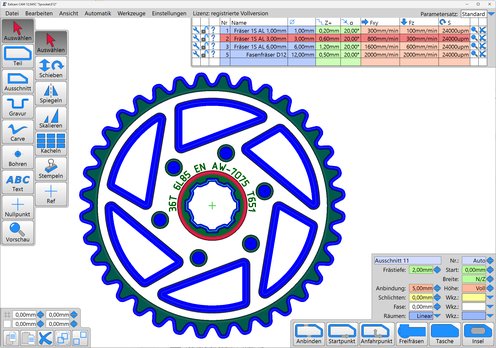
  • You can use Estlcam to create simple and fast text engravings...
  • You can find the button to activate the function at the left corner of the mainwindow...
  • It will open this dialog box:


  • Text:
    • You can enter your text in the large textbox...
    • Shortly after an automatic preview will appear in the red-rimmed textframe in the mainwindow...
     

  • Font:
    • Use the list at the top left corner to select a font...
    • There a 2 very different kinds of font in Estlcam:
      • "True" engraving fonts:
        You'll find them at the beginning of the list - they all start with "Estlcam Gravur..."
        They consist of simple strokes with constant width and are easy and fast to machine...
      • Standard fonts:
        The rest of the list comprises the regular fonts installed on your computer. Estlcam can process them for milling in various styles - there are some distinct advantages and disadvantages compared to the engraving fonts I'll explain below...


    • You can use this button to format the font bold...
    • This only works for standard fonts.
      With engraving fonts you achieve a similar effect by the choice of the tool diameter...


    • This button formats the font italic...
     

  • Font size:
    Contrary to printed text you'll have to consider a few things to get nice looking text engravings:

    • Engraving fonts
      The appearance of this kind of font depends extremely on the ratio between tool diameter and font size:
      Tool too thin compared to font size
      Tool size and font size fit well
      Tool too thick compared to font size

      The acceptable range is about 5:1 to 10:1 font size to tool diameter so engraving fonts are most suitable for rather small but not tiny texts...
       
    • Standard fonts:
      Here it depends on whether you're using a regular tool or pointed engraving bit ("v"-cutter)... With regular tools the ratio font size to tool diameter is usually 20:1 or more while engraving bits can be used for very fine, detailled texts... You'll find more details below at the font styles section...
     

  • Line spacing:
    • If line spacing appears too wide or too narrow you can correct it here...
     

  • Engraving depth:
    • Here you can set the desired cutting depth...
     

  • Aligning texts:

    • Rectangular text:
      • Thie buttons align your text left, centered, right or justified...
      • You can move the text by clicking at the desired position or by dragging the left, top or bottom border of the red textframe...
      • To change the width drag the right border of the textframe...
       
    • Circular text:
      • This button aligns the text in a circle...
      • You can move the center by clicking or dragging it...
      • Diameter can be changed by dragging the circle...
      • And the start angle by dragging the start line...
       

  • Font styles for standard fonts:
    The following functions are only available for standard fonts:

    Engraving along the outline:
    • The letters will just be engraved along their outline - the inside remains "hollow"...
    • Appearance depends heavily on the ratio between font size and tool diameter. 20:1 to 30:1 usually looks good. Below the lines will eventually start to touch and blend rendering the font ugly and unreadable...
    • Tip: rendering the preview for this style is relatively fast. Even if you finally like to use another style it may be a good idea to use this while typing - especially if it is a lot of text...

    Engraving at the outside:
    • Quite similar to above but the toolpath will be put to the outside of the shape similar to the "Part" function...
    • If the ratio between font size and tool diameter is too small lines will intersect and confuse the radius compensation - the result will be ugly...

    Engraving at the inside:
    • Again quite similar to above but this time the toolpath will be on the inside of the shape similar to the "Cutout" function...

    Letter pocketing:
    • This function creates every letter as completely cleared pocket - the inside won't be hollow anymore...
    • Again the ratio between font size and tool diameter must not be too small to prevent lines from intersecting themselves - if they do it won't work...
    • Fonts with distinctive edges will be rounded by the tool radius - the smaller the tool the more true to the original the text will be but machining time will increase accordingly...

    Letters as island within a pocket:
    • The counterpart to the last function: the letters stay and the material surrounding them is removed...

    Engraving with pointed engraving bit:
    • This function allows you to create very fine and detailed texts - but you'll need special engraving bits with a pointed tip insead of regular tools with a flat tip...
    • While the functions above all require quite large font sizes this one is also suitable for small ones...
    • But there are also some downsides:
      • Maximum stroke thickness is not allowed to exceed tool diameter...
      • Cutting depth depends on strock thickness and tip angle of the tool so large and bold fonts require deep cuts...
      • The material an your machine bed needs to be perfectly flat - otherwise it will change cutting depth and with it stroke thickness...
 
  • Explode text:
    This option decides what happens to the text after clicking OK:
    • If inactive the text will be saved as single object. You can later select it again and modify text, font and formatting. However anything you do outside the text dialog box (e.g. moving, rotating etc.) will be lost once you reselect the text...
    • If active the letters will be saved as individual objects. After this you won't be able to change the text itself, font or formatting - but now you have access to each single engraving and are able to manipulate it permanently...
     

  • Christian Knüll / Heidelbergerstr. 6 / 74746 Höpfingen / Deutschland / christian@estlcam.de